How to Mic and Record Drums to Get a Great Professional Studio Sound
Recording drums can be one of the most challenging aspects of creating a quality audio experience. They are without a doubt the backbone of any rhythm section and the central driving force that energizes a song. The "Kick Drum" and "Hi-Hat" provide crucial timing and beat while the "Cymbals" and "Tom Toms" emphasize essential accents where points of drama or excitement come together.
In this article, I will offer some basic and advanced techniques which should guide you through a vital part of achieving a great sounding drum kit.

MIC PLACEMENT
-
Kick Drum
One of the most crucial elements of recording the overall sound and ORA of a drum kit is learning how to get a powerful yet managed "Kick Drum" sound. If you insert a CD of your choice into a stereo system and listen closely, no matter what style of music is emanating from the speakers, you will almost always hear the same "Thud" sound as it keeps the tempo for all other instruments. The dynamic range, volume, and pitch might change slightly between the varying music genres, but the overall controlled "Thud" or "Boom" sound remains intact. If you search around the Internet I'm sure you will find an unlimited number of sources offering opinion on how to get the "Best" recorded "Kick Drum" sound, so here's one more to add to the collection that I think will produce more than satisfactory results.
- NOTE: The closer your mic is placed to the skin, the more of a flat "Thud" sound you'll get and vice versa as the mic is moved further away -
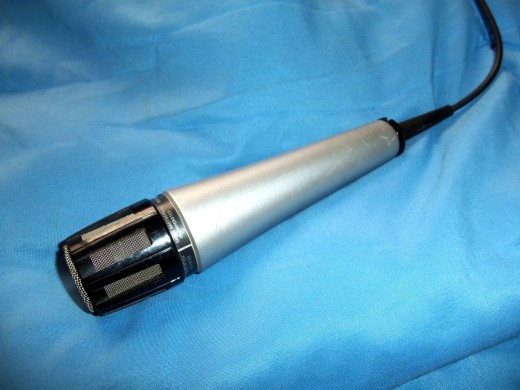
We use a "Dynamic" all purpose model in the following example. I find this type to be perfect for the application. It will pick up the entire spectrum of the inner drum cavity giving it a fuller, more solid sound.
Place the mic 1 to 2 inches away from the skin ( If placed too close it may result in an unwanted crackling or popping artifact ). Next, perform a quick sound check to make sure it's working ( You don't want to get that perfect in sync take then find out the recorder was not turned on ), and to see if you're producing the desired sound. The further away the mic is, the more likely it will pick up a reverberation effect or possibly other unwanted "Artifacts". A quick sound check should dictate placement adjustments. Today, in the modern digital and fiber optic age, several of the Digital Multi Track Recorders come complete with built in, pre-programmed effects including several different drum kit sounds, so you may find it uncontrolably tempting to simply push a button and insert a selection during the recording session, but I would strongly advise against this. Which leads me to the first tip. It may be common knowledge to the experienced pro however, it can turn out to be a significant time saver for the beginner.
- Tip - When recording, try to get the "Kick Drum" to sound as flat as possible, zero reverb or echo is best. It's always easy to add effects later in post production, but it can be very difficult if not impossible to eliminate them. Record the track as raw as possible -
-
Hi-Hat & Snare
For the Snare & Hi-Hat, we use a good quality condenser mic, it doesn't need to be a top of the line "Wallet Buster" model but at the same time avoid using something from the bottom rung. Here's where placement is crucial to produce the desired amount of "Pop" and also the exact snare to Hi-Hat ratio mix to compliment the style of song.
Despite what you may have heard or read, this endeavor is certainly not brain surgery and it's something that can usually be accomplished with ease. Once again, to emphasize the importance of "Listening" to what your about to record as a potential time saver, you should plug the mic into the recorder for a quick sound check, then experiment by moving the mic around in different locations and positions. Closer to the snare and further from the Hi-Hat, closer to the Hi-Hat and further from the snare etc. When using one mic for both kit pieces it's imperative that you get the proper complimentary mix while recording the raw tracks. Although not impossible, it's extremely difficult to try to alter or modify the ratio in post production, so make sure you have it pretty close to the desired sound by performing the preliminary sound check before recording.


-
Tom Toms
In this example we'll use a "Dynamic" mic in a simple 2 Hi-Tom scenario. Place the mic on a stand, raise it approximately 6 to 8 inches higher than the Toms, then position it right in the middle of both and point it in a downward 45 degree angel toward the skins. Minor adjustments can be made during a sound check. Assuming you have a ride & crash cymbal within a couple feet of this mic as is the case with most standard kits, the sound from the cymbals should bleed nicely into it. The same applies to the Floor Tom, this one mic should provide enough pickup to include it's presence.

-
Cymbals
If you use the techniques described in this article there should be no need for individual mics to capture cymbals. I get a fantastic natural bleed and mix via the Tom mic. It's certainly not perfect but placement and recording of a drum kit will never be an exact science, it's all just a matter of what the individual artist finds appealing and how it fits into his or her song. One persons "Perfect" sounding drum is another's "Mediocre", and so it goes.
- NOTE: Using 2 additional overhead mics of the same make & model spaced very closely together to potentially capture an additional stereo effect will certainly not hurt, however, I've never found it to be an essential element. You will still get a very rich, full, dynamic sound as a result of the Tom mic & Snare mic bleeding into each other, this will produce a nice stereo effect on its own and you can further manipulate later by layering & pan placement in post production.

- Post Production Drum Tips -
There are a wealth of different DAW or software programs on the market today which are designed to augment & enhance the post production aspect of creating a final song, and each have their own unique features & tools to help the artist fine tune their work. Some packages are more costly than others but they all have one thing in common, they are designed to help you make your music the best it can possibly be. Regardless of the brand you choose and despite the price paid, it will certainly be of benefit in one way or another because all Mixing & Mastering software contain plenty of tools to help you achieve an excellent final result.
- Additional Mixing & Mastering Tips -
- Tip: Always add reverb to the Snare & Hi-Hat Track, this will give dimension to an otherwise "Flat" raw sound. But never use reverb in the recording stage, this usually cannot be removed later on if you're not satisfied with the sound. Always add reverb but make sure it's applied in "POST PRODUCTION" where it can be manipulated to the desired degree.
- Tip: Try adding a little delay to the Snare & Hi-Hat Track, once again this should be done Post Production only.
- Tip: Always add EQ to the Snare & Hi-Hat Track. Boost a little in the mid range and a little more in the high range to give it more dynamics. Once again apply only in "Post Production".
- Tip: Experiment with "Pitch Manipulation" on the "Tom" Track. This may open up new frontiers for lowering the pitch to achieve a deeper fuller sound. ( This tool is designed mainly for guitars, but with a little experimentation, it can work wonders on Toms ).
- Tip: Experiment with reverb on "Tom" Track.
- Tip: If the "Kick Drum" is "Bleeding" into the "Tom" Track . try strategically placing a 12 X 12 inch piece of foam or other comparable material somewhere between the Tom mic and Kick Drum to cut off the traveling signal. Experiment on placement.


- NOTE: Depending upon where your drums are located, the degree to which the "Room" sound appears on the recording will vary. There are several techniques you can try to eliminate or reduce this effect if that's your choice. Try surrounding the entire drum kit with an absorbent material such as large rugs etc. This should trap the signal and mitigate the "Muddy" garage sound.
- Mic Placement and Recording Techniques are both very important aspects of creating a studio quality drum kit sound which enhances the overall listening experience. We've discussed several different ways to help both the novice and pro achieve this frequently elusive yet very attainable goal. In the future, I will continue to publish articles which should help you make continuous progress as you seek the best possible drum sound on your recordings.
- Please see below for additional informative articles designed to guide you step by step toward improving the quality of your recordings -
<> Original Custom Images Created By Alternative Prime <>

